Fit Once™ Installation Instructions
NEW: TOP TIPS VIDEO FOR CORRECT INSTALLATION CLICK HERE OR WATCH THE FULL VIDEO HERE
STEP 1
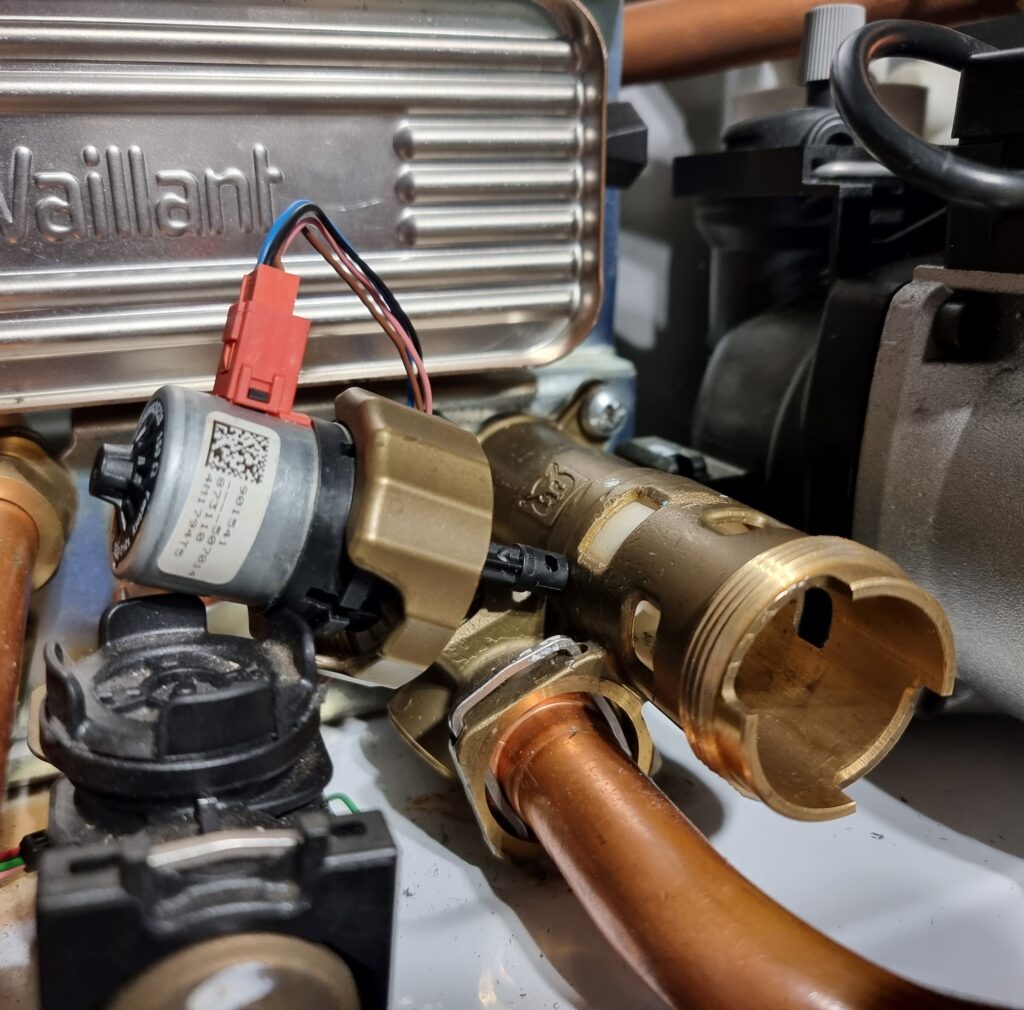
Reset boiler and wait for motor to activate – the motor arm will retract, pause and then extend. The valve will now be in heating mode with arm extended (the default position). Remove retaining nut and unhook motor arm from cartridge steel pin.
After motor has been removed, close both boiler service valves and drain down boiler. While the boiler is draining you may complete steps 2 – 5.
STEP 2
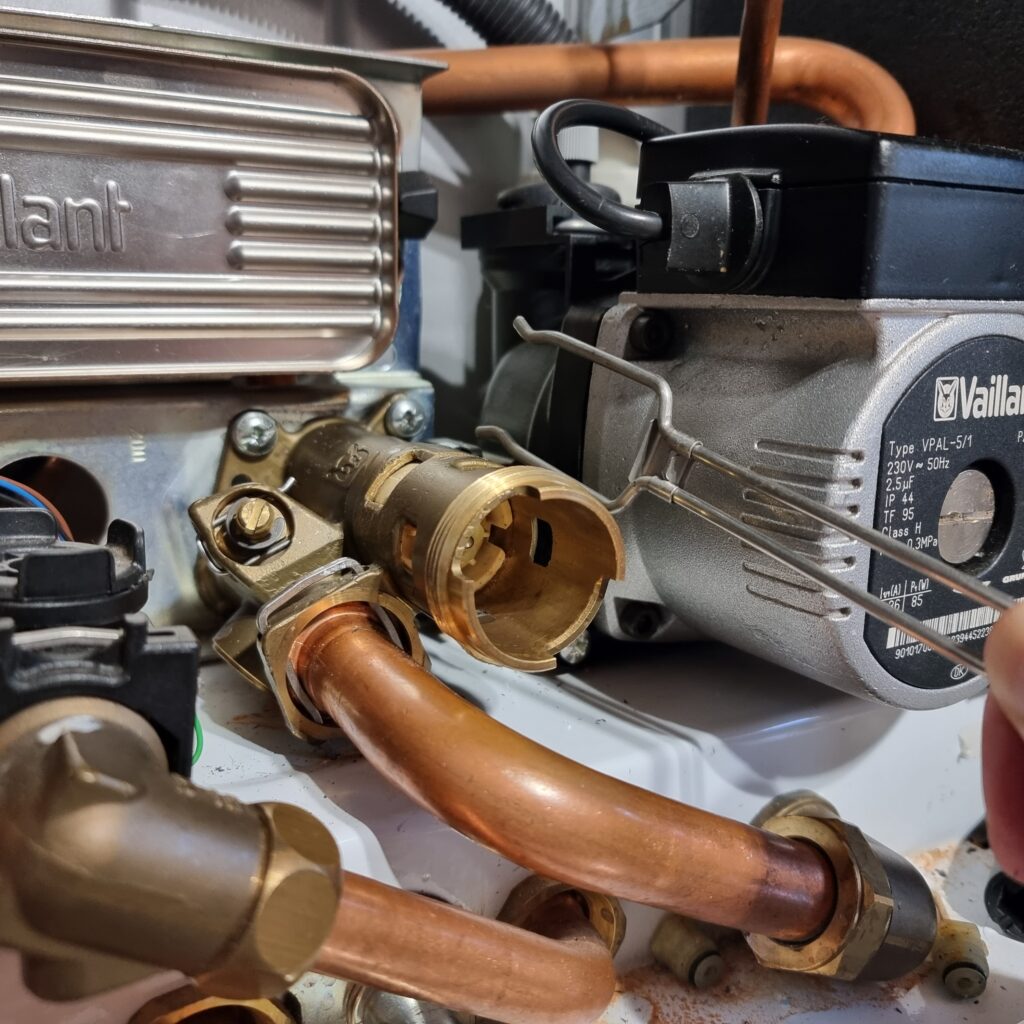
Remove stainless steel clip
STEP 3
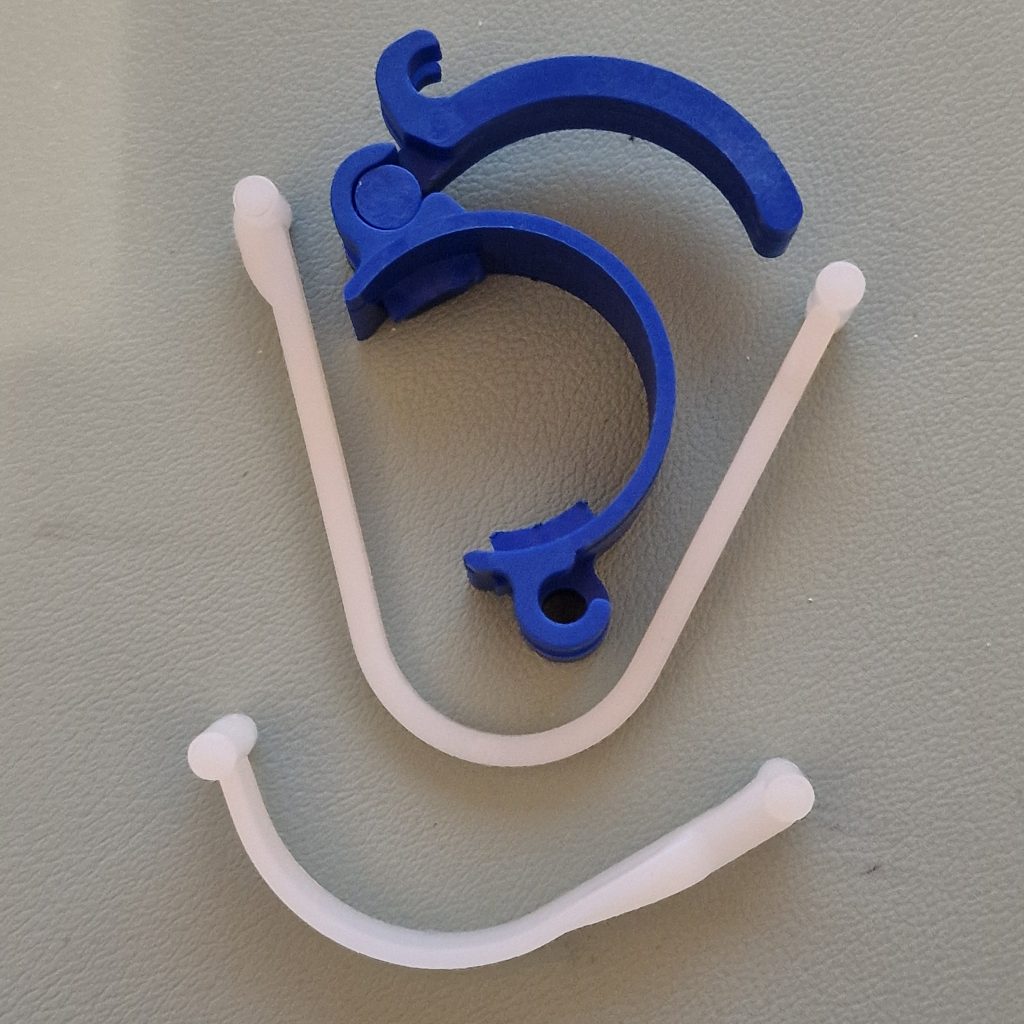
Select and fit long strap
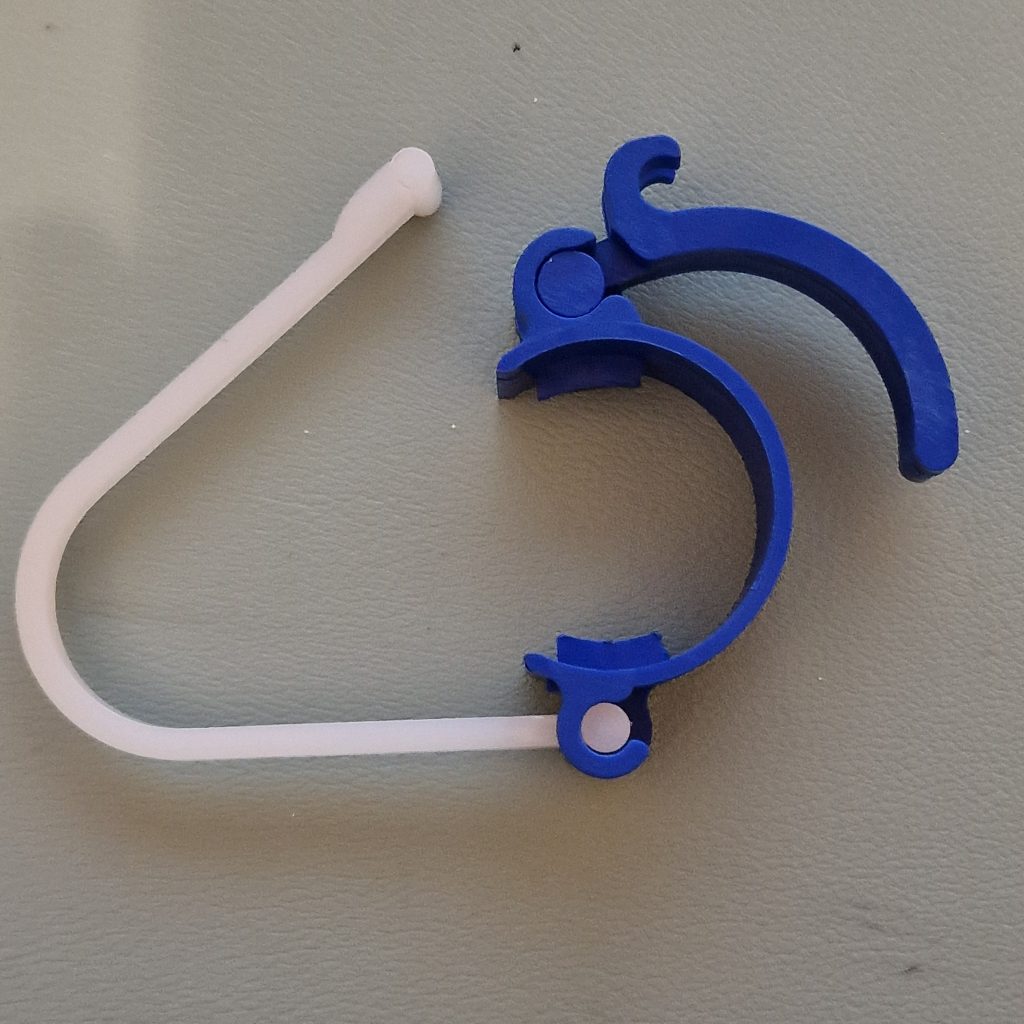
STEP 4
Place clamp around valve. The strap should be pushed underneath the valve.
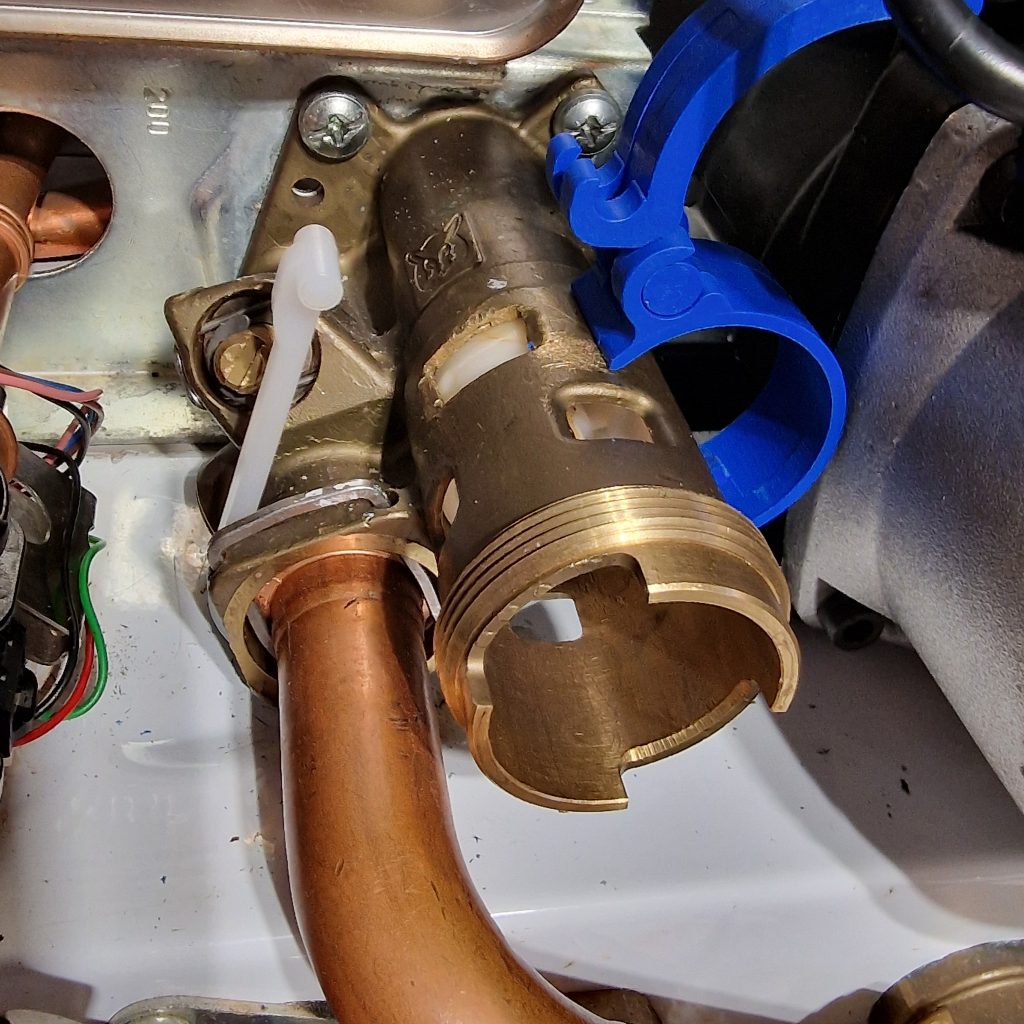
STEP 5
Lock the clamp into position on the valve and attach the strap to the lever
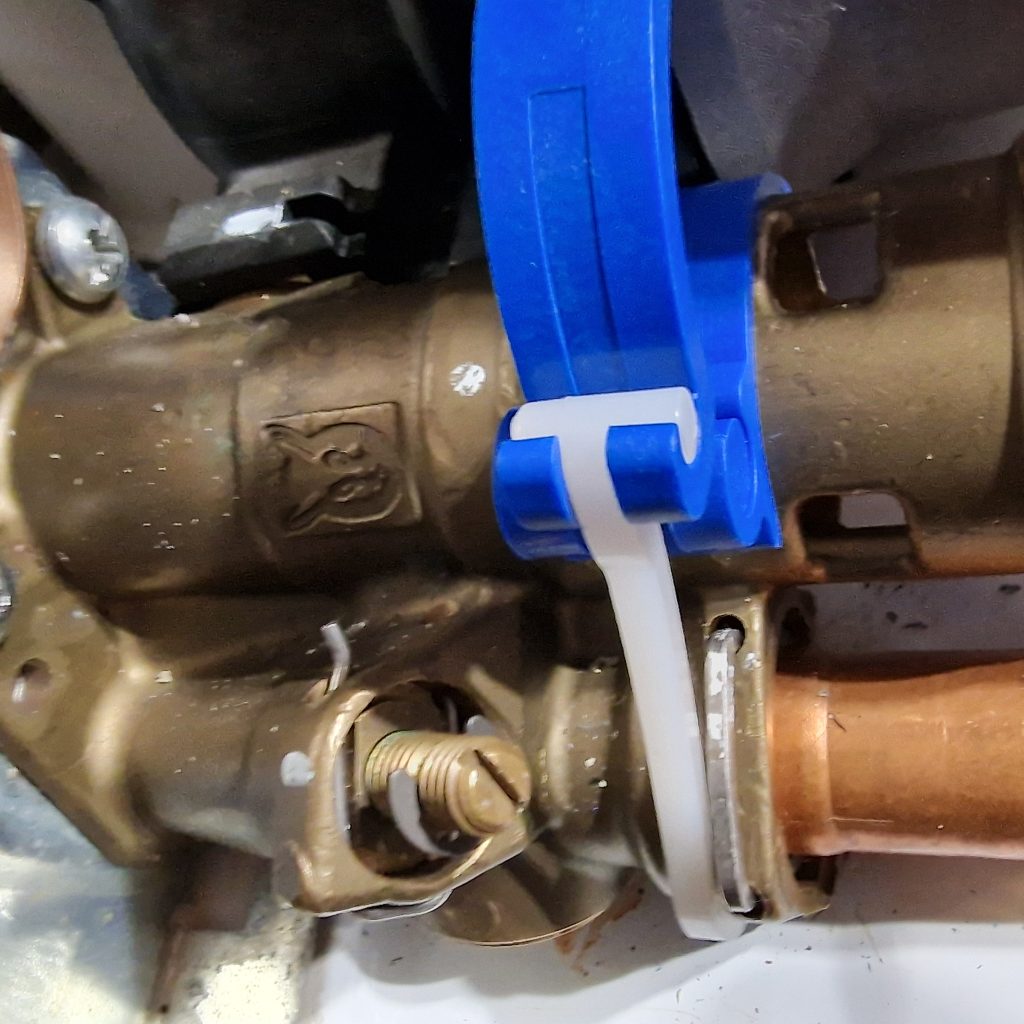
STEP 6
With boiler fully drained, insert service tool and turn in clockwise direction. Now gradually press down on lever – when tool starts to turn further, release pressure on lever and continue to turn by 90 degrees. The cartridge has now been disengaged.
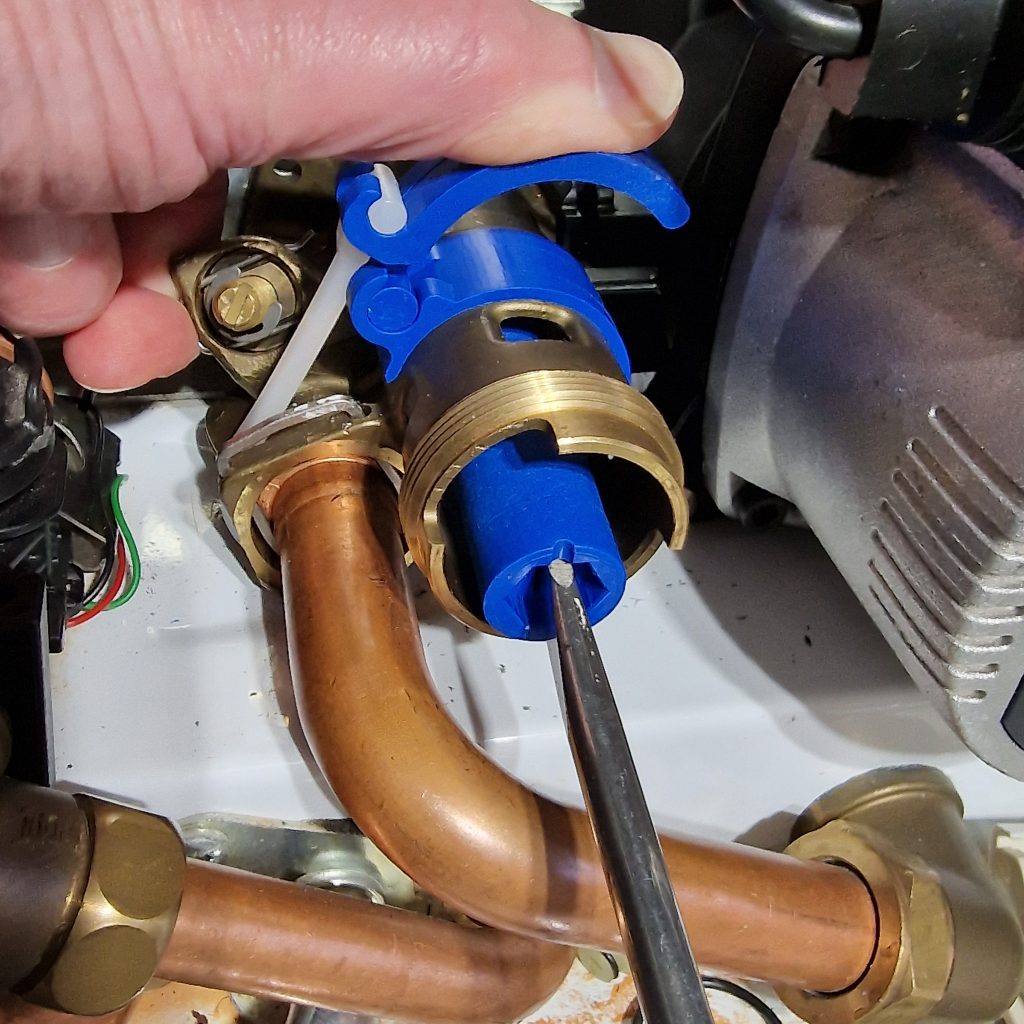
STEP 7
Remove strap and clamp. Attach extractor tool to cartridge pin and pull out cartridge.
Clean inside valve and check that both O rings from the old cartridge have been removed.
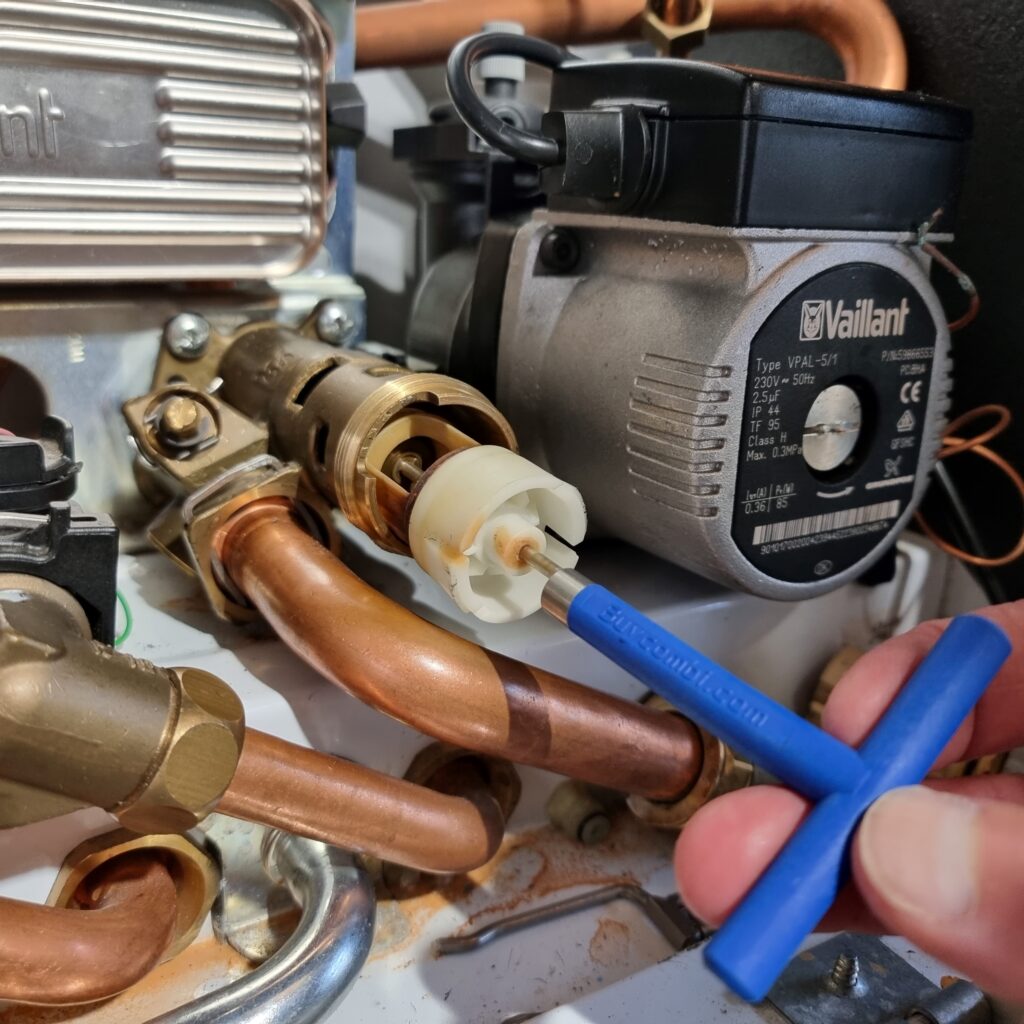
STEP 8
If not already installed, fit the 2 external O rings on the Fit Once™ cartridge – smaller O ring at the bottom. Lubricate both well with silicone grease. Note: grease must be applied; the O rings will twist / be damaged or not seal properly if grease is not applied.
Press in part way by hand as pictured. IMPORTANT: One of the retaining lugs on the cartridge has a small arrow. The cartridge should be inserted with this arrow roughly in the 11o’c position.
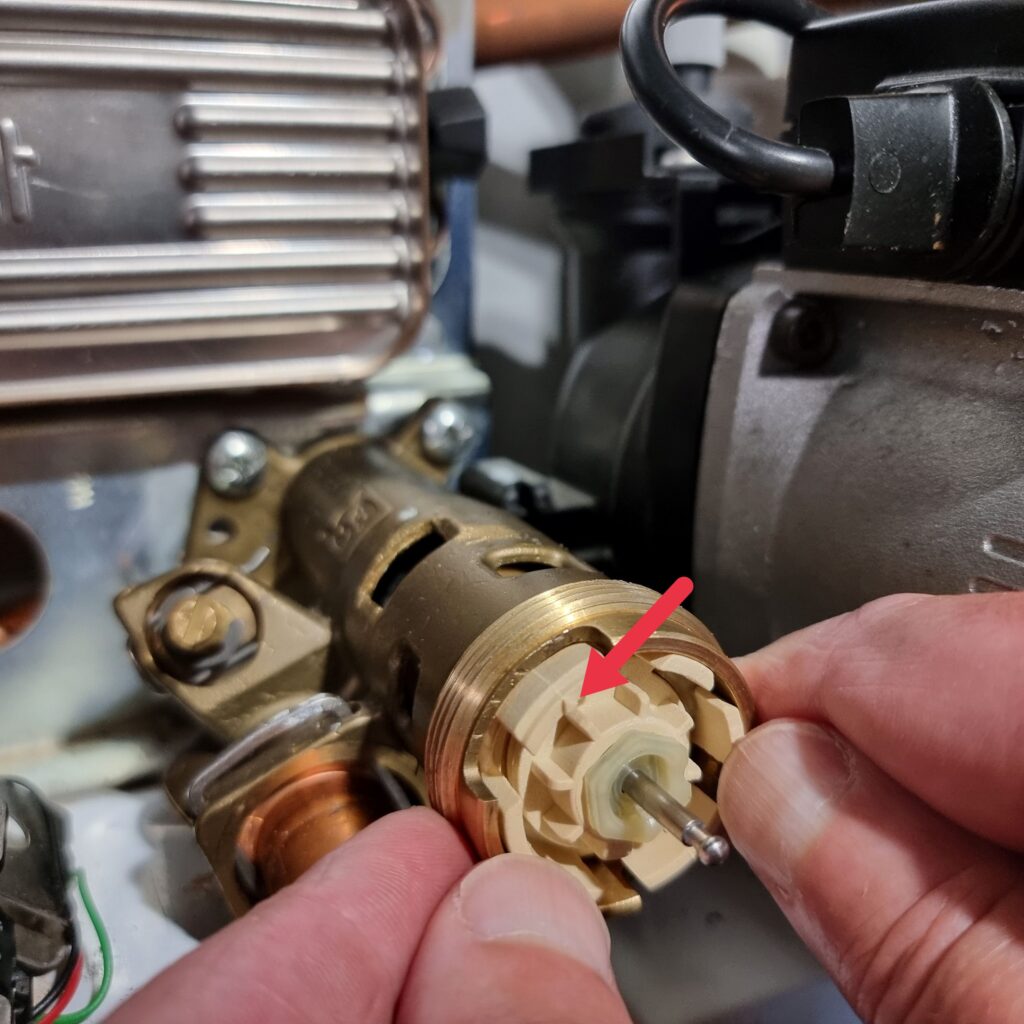
STEP 9
Use the insertion tool to adjust the position of the Fit Once™ cartridge so that the retaining lug lines up with the hole in the diverter valve body (as pictured) and then press firmly home.
After insertion, CHECK THE CARTRIDGE HAS LOCKED IN PLACE by turning the insertion tool to the right and left. There should be limited movement when turning.
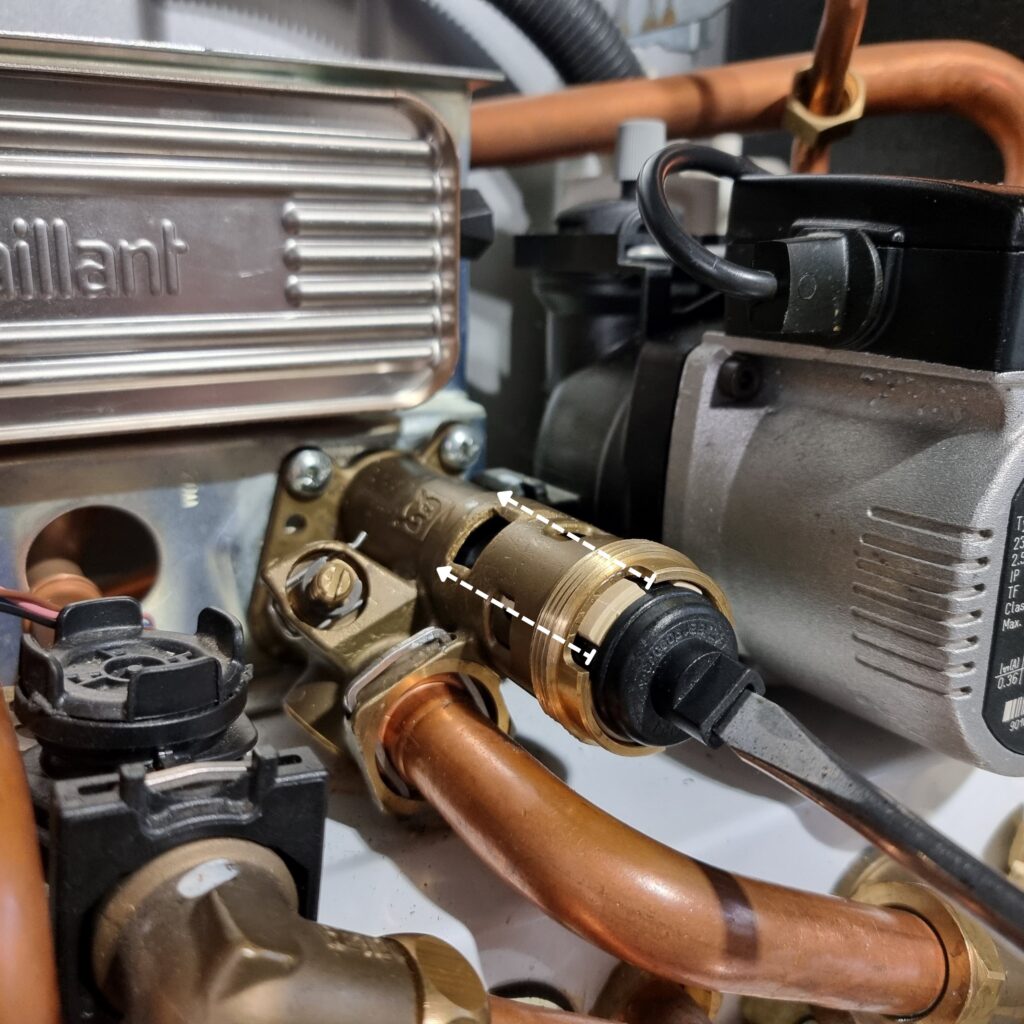
STEP 10
Mate the service tool (pictured) below with the Fit Once™ cartridge Note: the teeth on the service tool are irregular and will only mate with the cartridge in one position. Ensure the slot shown by the red arrow is in the vertical position. This confirms the internal service seal in the Fit Once™ cartridge is in operational mode.
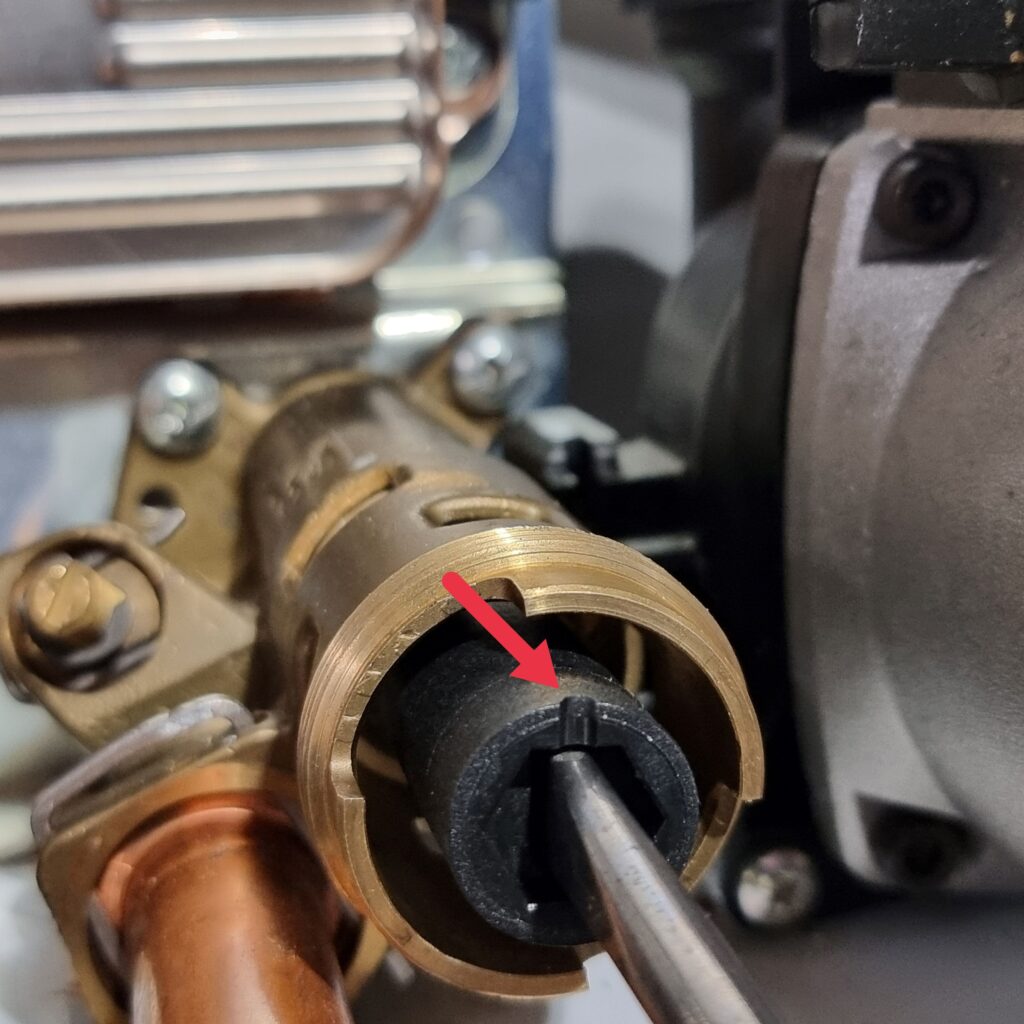
STEP 11
Insert stainless steel clip between pump and valve and attach motor. Open both service valves, refill boiler and purge air. Test heating and hot water mode on boiler.
STEP 12
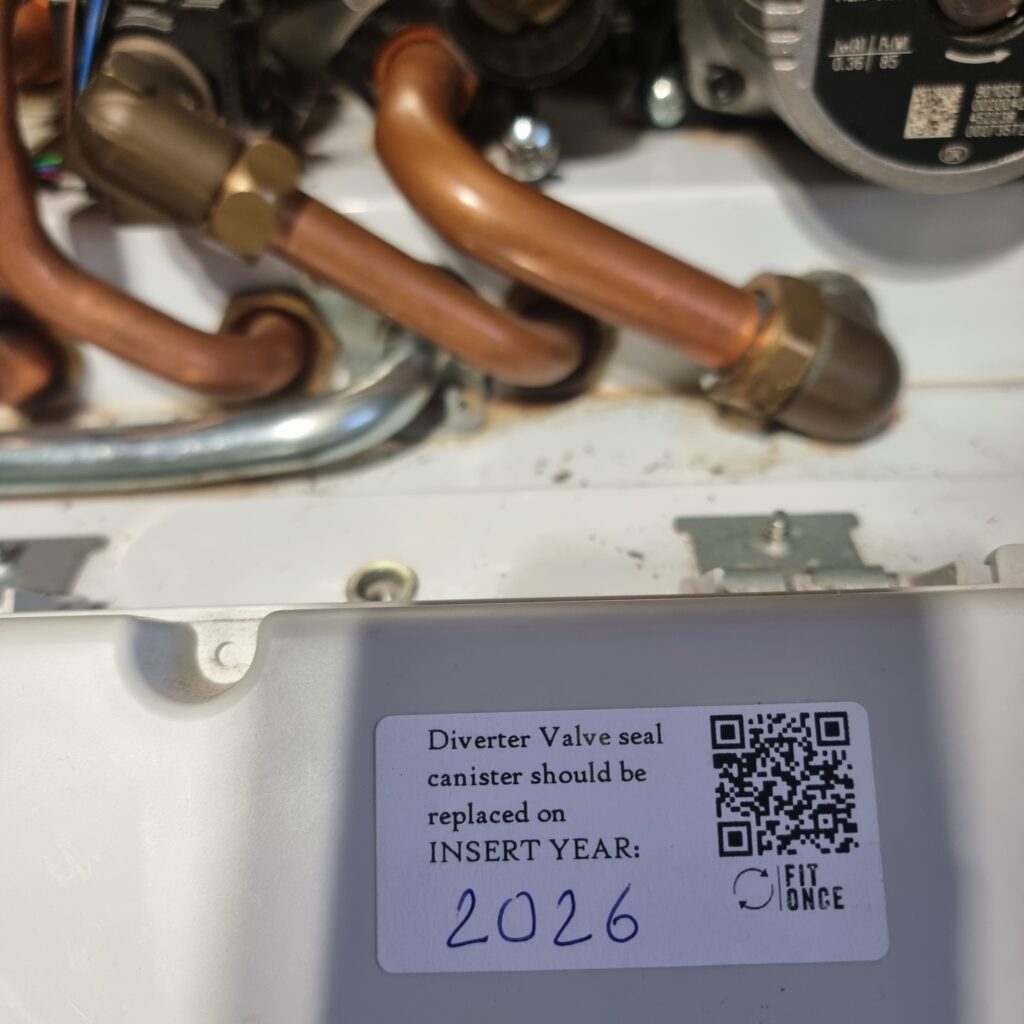
If included in the trade cartridge pack, complete next service date sticker and fix as shown below. Providing the system water is clean and a magnetic filter is fitted, the seal canister should be replaced every 4 years.